Looking at old photos often makes us emotional.
Vintage images instantly lift our emotional & sensory feelings, which we may have felt in that very moment years ago.
We often feel the urge to imagine what that very moment actually looked like.
In the past we had to do extensive photoshopping to restore any old photos.
With Pincel AI Editor, we can restore any photo or image within seconds.
All we need to do is to upload your photo, type what we want to do and let AI do the rest.
Here’s how it works
Restoring One Old Photo Can Eat Your Entire Afternoon 🕰️
Traditional restoration with photoshop is a slow process.
It’s a test of patience where we need to fix blurs, tones, creases or color shifts.
So it’s not really worth it to spend so much time behind it.
Hiring a retoucher means additional cost and burden of communication.
That’s why Pincel AI Editor exists.
It gives you a fast, browser-based way to restore old photos using AI without all these complicated processes.
How to Restore Old Photos with Pincel AI ✅
🖼️ Step 1: Upload Your Old Photo
Go to the Pincel AI Editor,
Click upload, and add your scan or digital file.
A higher-resolution scan helps, but even a quick phone photo of a printed picture can work.
📝 Step 2: Type a Simple Restoration Prompt
In the prompt box, describe what’s wrong and what you want back.
Try prompts like these (copy/paste friendly):
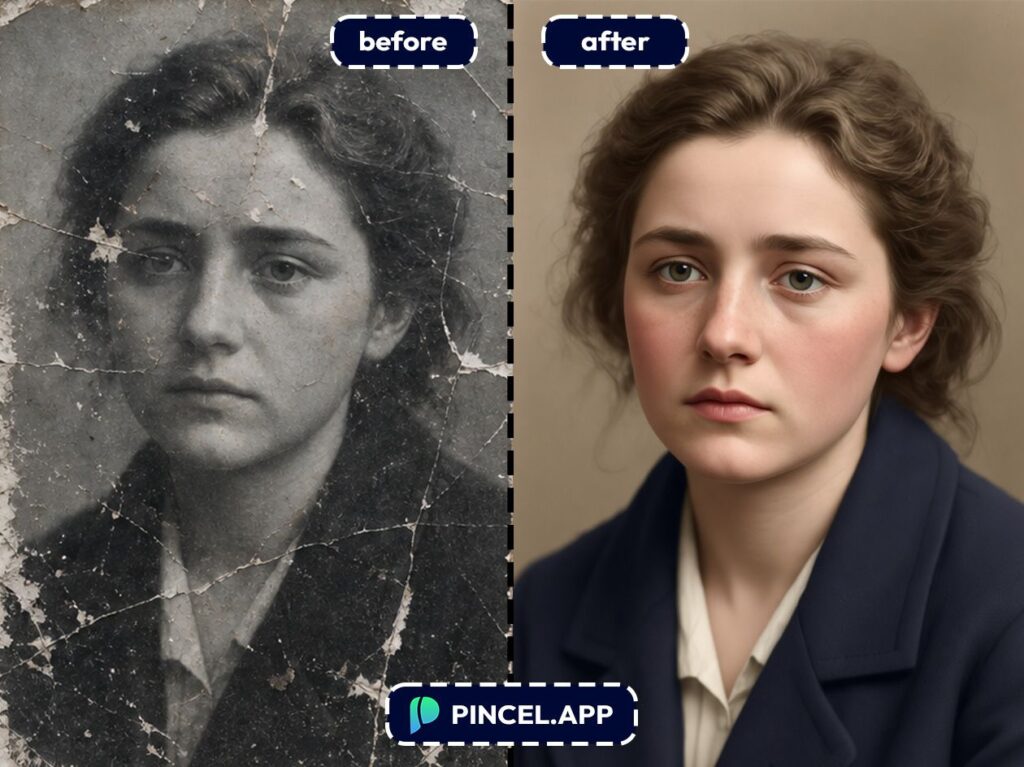
- “Restore this old photo: remove scratches, dust, and cracks. Keep faces the same and make it look natural.”
- “Fix faded colors and yellowing, improve contrast, and sharpen slightly without changing the people.”
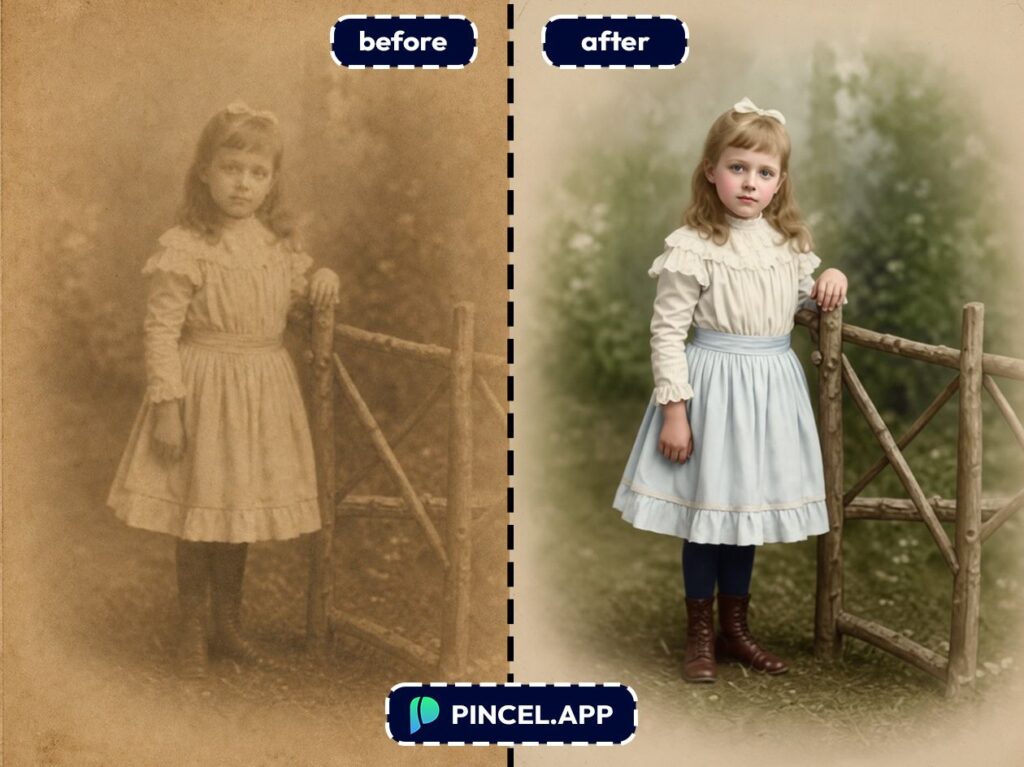
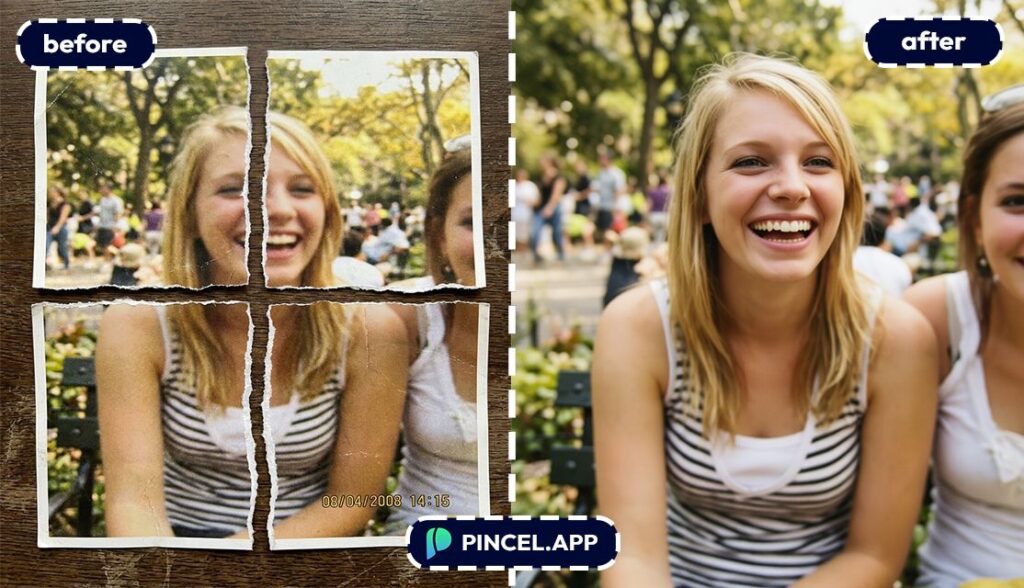
- “Repair torn edges and missing corners, reconstruct the background realistically, preserve original composition.”
- “Convert to clean black and white, reduce noise and stains, keep a vintage film look.”
⚡ Step 3: Click Generate
Hit Generate and you’ll usually see a restored version in about 5–10 seconds.
Because Pincel edits your image (instead of generating a totally new one), it’s great at preserving layout and subject consistency.
If you want it cleaner, run a second pass with a more specific prompt.
If you want it more authentic, ask for “subtle restoration” and “keep the original film grain.”
📥 Step 4: Download or Iterate
Download your restored image when it looks right.
Or keep iterating: dust removal first, then color repair and then optional enhancements like lighting.
This is the part that feels like cheating.
Who Is This For? Real-World Use Cases 👇🏼
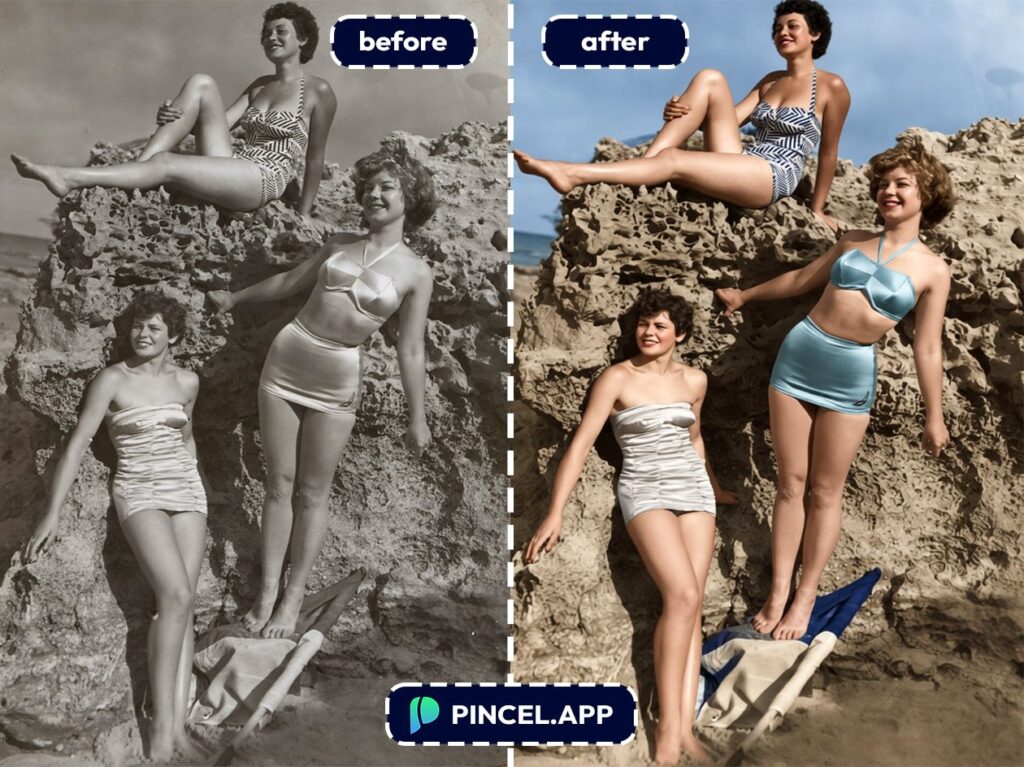
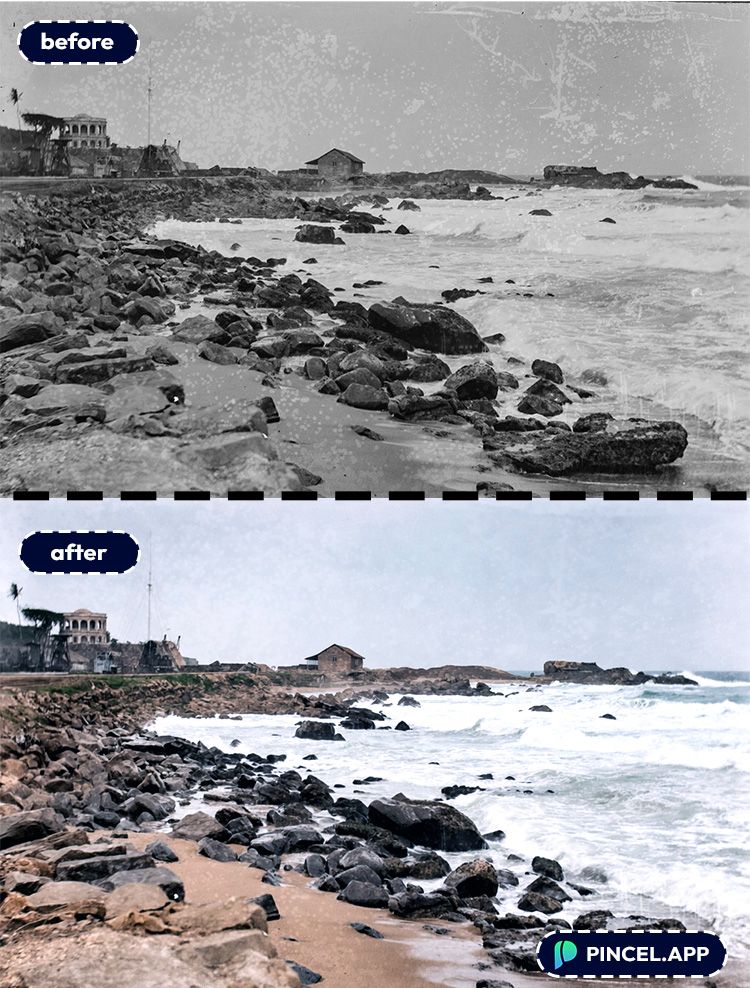
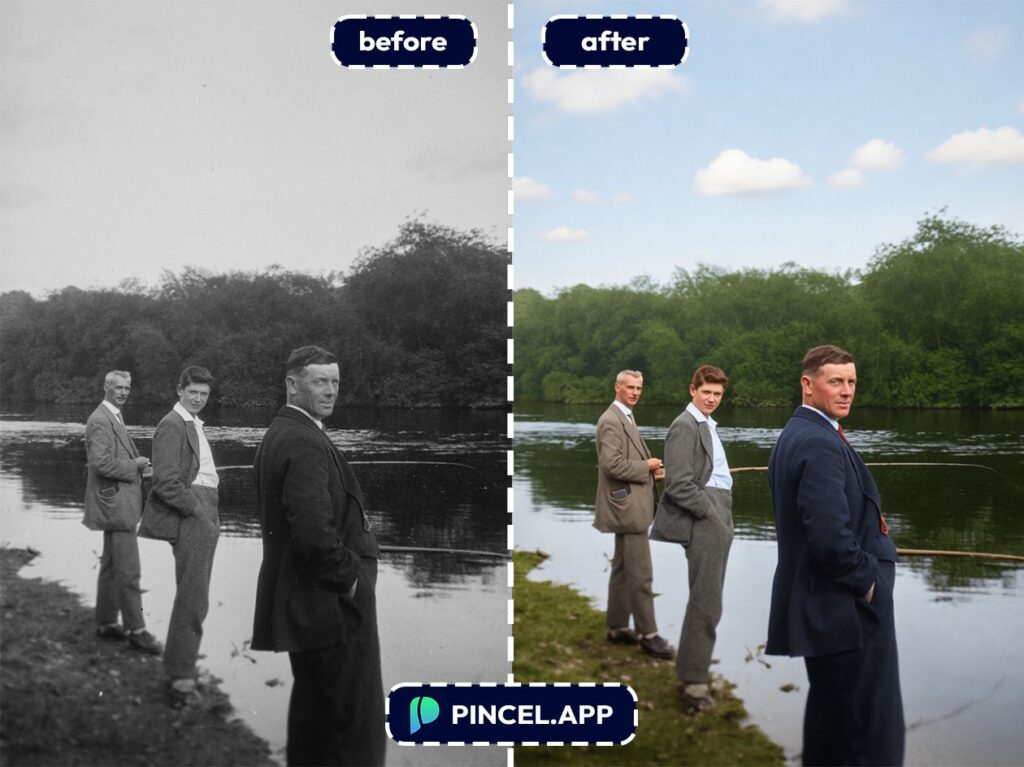
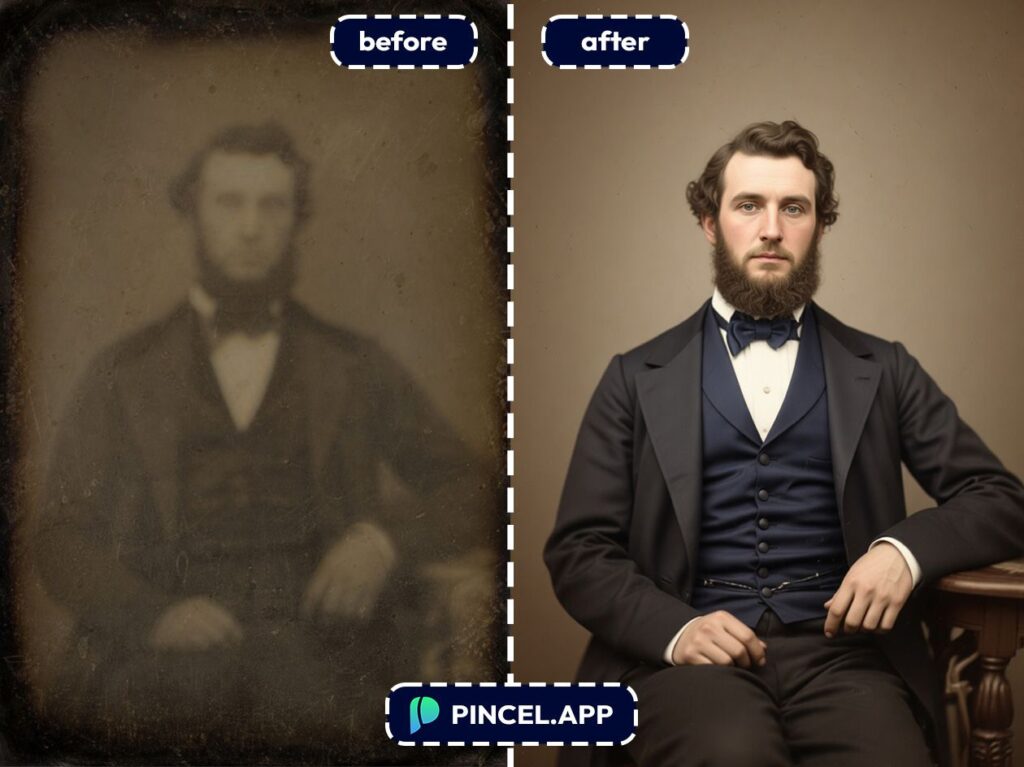
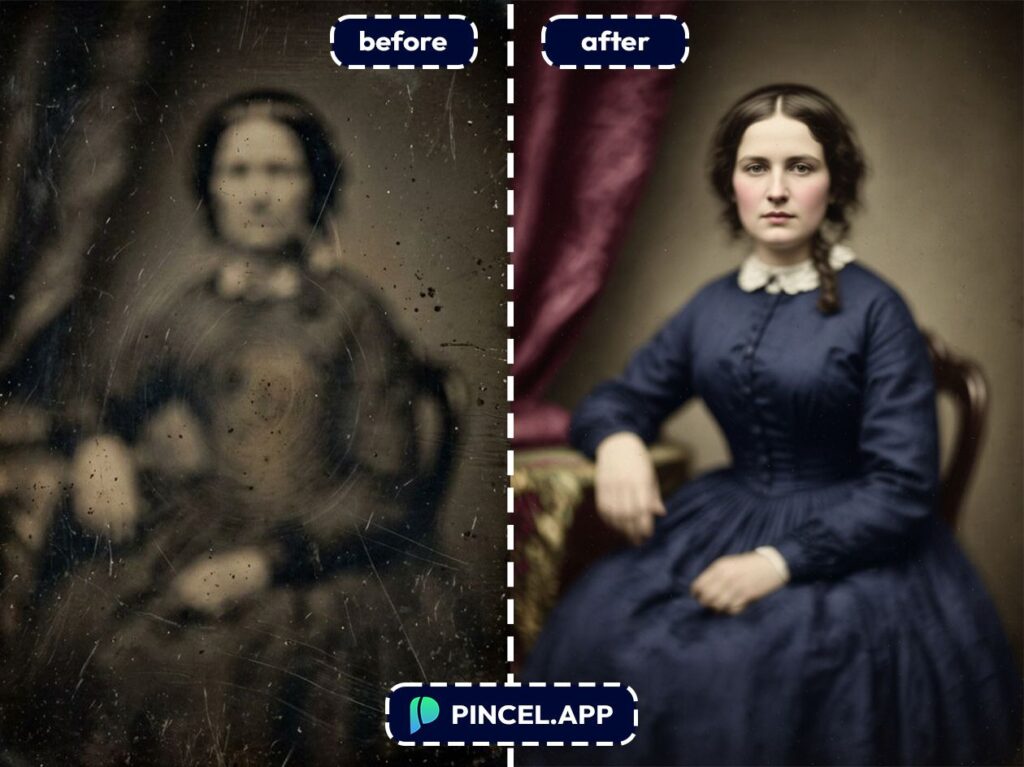
Family archives — Restore grandparents’ portraits, wedding photos, and childhood snapshots without sending them to a studio.
If you’re also rebuilding missing areas, then the workflow feels a lot like extend photo with AI, just applied to damage.
Genealogy projects — Clean up scanned documents and family album photos so faces are clearer and easier to identify.
And if you need to combine multiple sources, combine photos is a handy companion.
Content creators — Make “then vs now” posts that don’t look like they were dragged through a fax machine.
You can even experiment with stylized versions after the restore using AI coloring.
Photographers — Offer a quick “basic restoration” add-on for clients who bring old prints.
If lighting is uneven, pair restoration with relight photos with AI for a clean, modern scan look.
Personal branding — Clean up an old headshot you still love, without making yourself look like a different person.
If you’re upgrading professional pics in general, AI resume photo is worth a look.
Fun creative edits — Restore first and then go creative.
Turn the cleaned photo into something playful like an AI Memoji or build a themed look like Valentine AI photos.
Damage control for modern photos too — If you can remove scratches, you can also remove plenty of other distractions.
The same editor powers tricks like clone objects and even edit text on an image.
Frequently Asked Questions 🤔
How can I restore old photo using AI without changing the face?
Use prompts that explicitly say “preserve facial features” and “keep identity the same.”
If the output looks too “beautified,” regenerate with “subtle restoration” and “keep original skin texture.”
Is Pincel AI Editor free for old photo restoration?
Yes, you can try it for free with 20 credits and no credit card.
A single generation uses credits, so you can test a few versions and pick your favorite before upgrading.
How long does AI photo restoration take?
Most edits appear in about 5–10 seconds in the browser.
If you do multiple passes (damage removal, then color, then sharpening), you can still finish a photo in under a minute.
Can AI fix torn photos or missing corners?
Yes, AI can often reconstruct missing edges and corners if you describe what should be there.
Results depend on how much is missing, but iterative prompts usually get you surprisingly far.
What’s the best prompt to restore old photos?
The best prompt is specific about the damage and strict about keeping the original.
Start with something like “Remove scratches and dust, fix fading, preserve faces and original composition, natural result” and refine from there.
Is this better than Photoshop’s generative tools?
Photoshop is powerful but slower, more complex and easier to overdo unless you’re experienced (see: Photoshop generative fill alternative).
Let’s Bring the Old Photos Out 📸
If you have an old photo you may have always wondered how it would look today.
No worries, Pincel AI is your best friend.
It is super simple, because you just describe what you want and let the AI do the rest.
So, go ahead and restore that group photo with Pincel AI Editor from years ago.
And surprise your friends with it!