Looking up at a beautiful night sky reminds us that we’re part of something vast and beautiful.
Stars that have been there longer than any of us.
Light that traveled further than we can imagine.
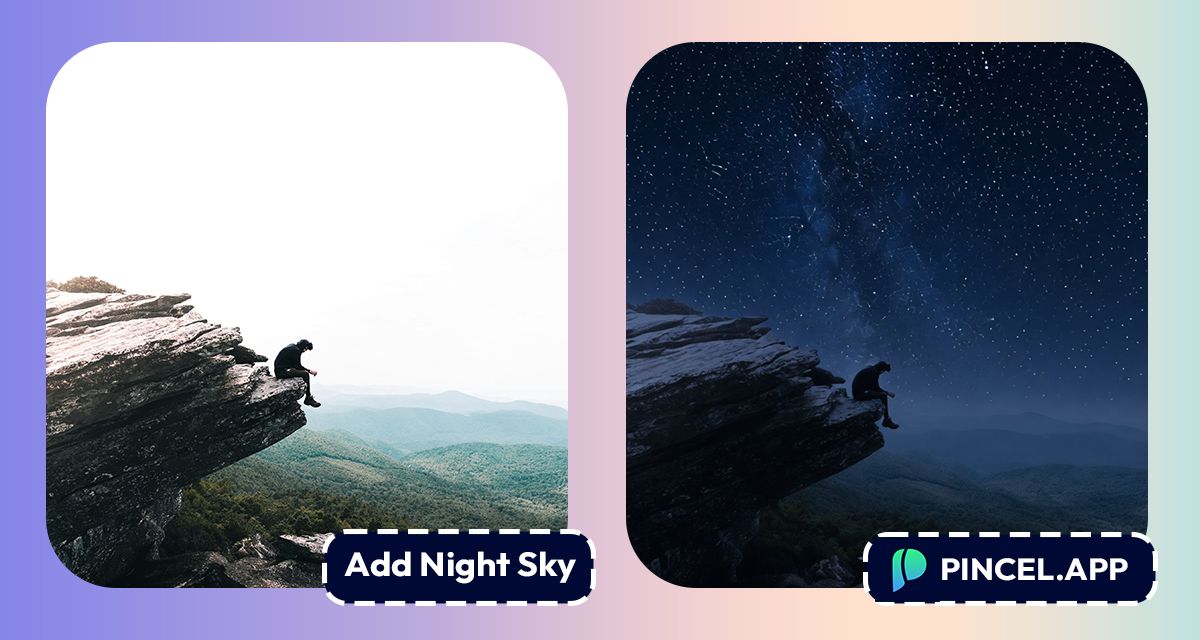
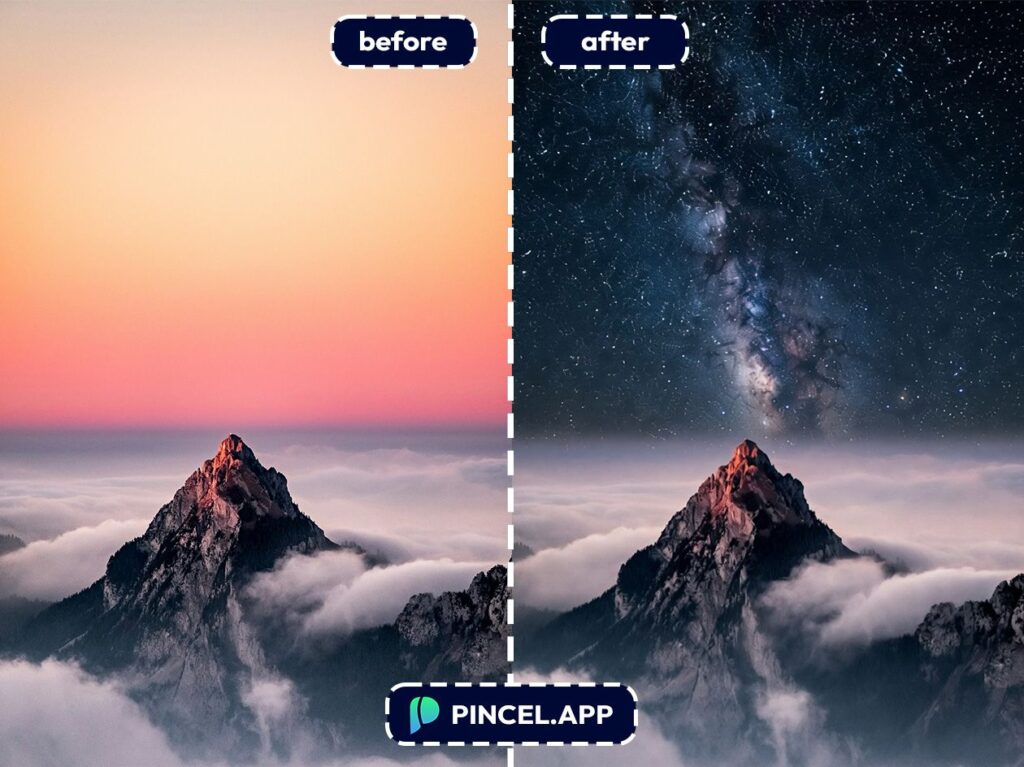
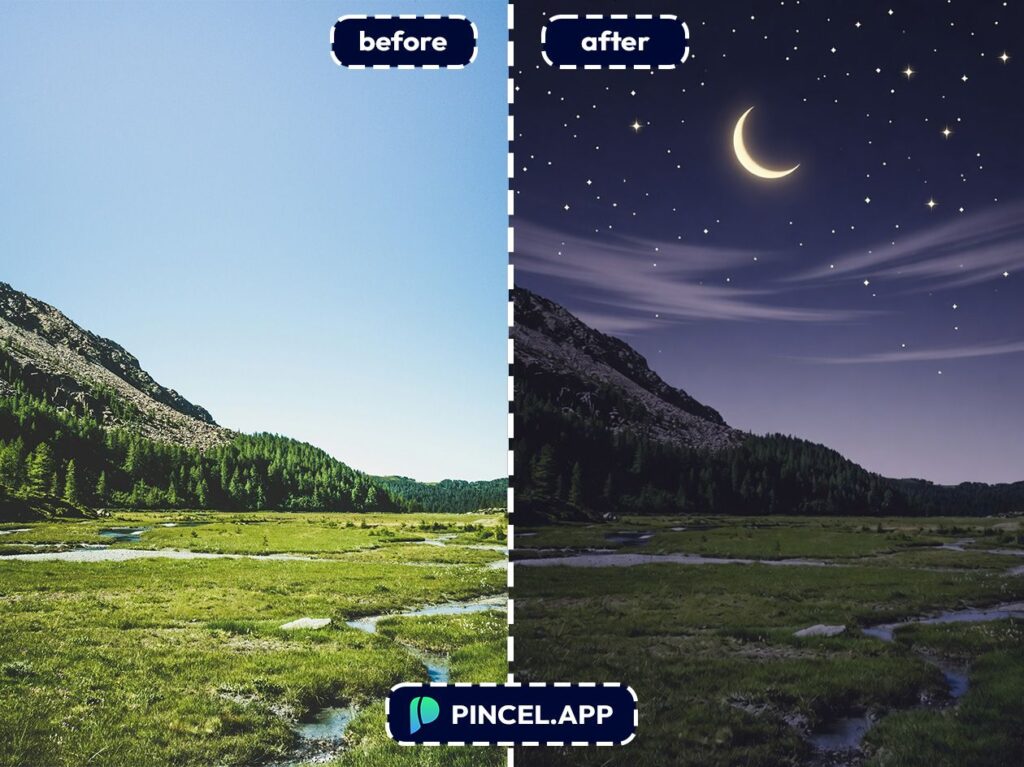
In the past, turning a day time scene into a night scene or adding night sky in images meant hours in photoshop.
But now, with Pincel AI Photo Editor, you can add a night sky to a photo using AI in under 10 seconds.
It’s a very simple process.
All you need to do is to upload your photo, type what kind of sky background you want and you can see amazing results in under 5 seconds.
Here’s how it works
Your Photo Deserves a Better Night Sky 🌌
It’s possible to do this in Photoshop.
But there are multiple steps like temperature, masking, lighting etc which takes a significant amount of time.
Often, it looks like someone cut and pasted the universe onto your photo.
Hiring someone to do the retouching means extra cost.
That is exactly why Pincel AI Photo Editor exists.
Upload your photo, describe the sky you want, and get a natural result in seconds.
No masking and no color matching
How to Add a Night Sky to a Photo — Step by Step ✅
🖼️ Step 1: Upload Your Photo
Go to the Pincel AI Photo Editor.
Click Upload Image and choose your landscape, street photo, portrait, or product shot.
Clear horizons help, but Pincel can handle messy edges like trees and hair surprisingly well.
📝 Step 2: Type a Simple Prompt
In the prompt box, describe the night sky you want.
Try one of these (copy/paste):
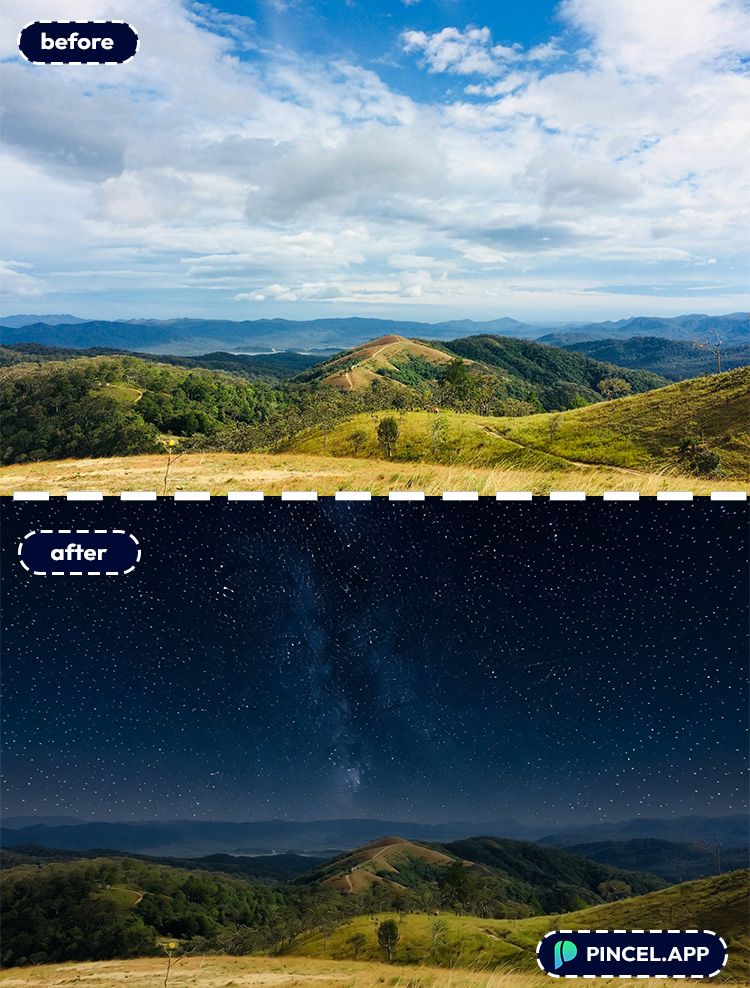
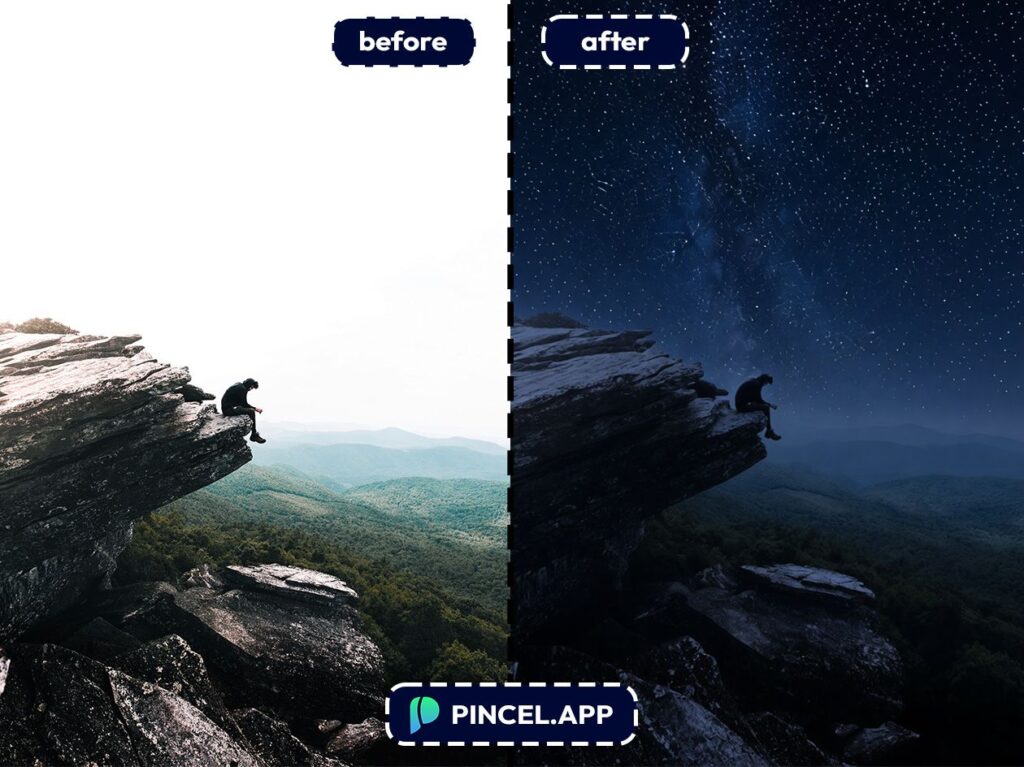
- Replace the sky with a clear starry night sky, keep everything else unchanged
- Make it nighttime with a Milky Way sky, realistic stars, subtle moonlight
- Change the sky to a deep blue night with a bright full moon and light clouds
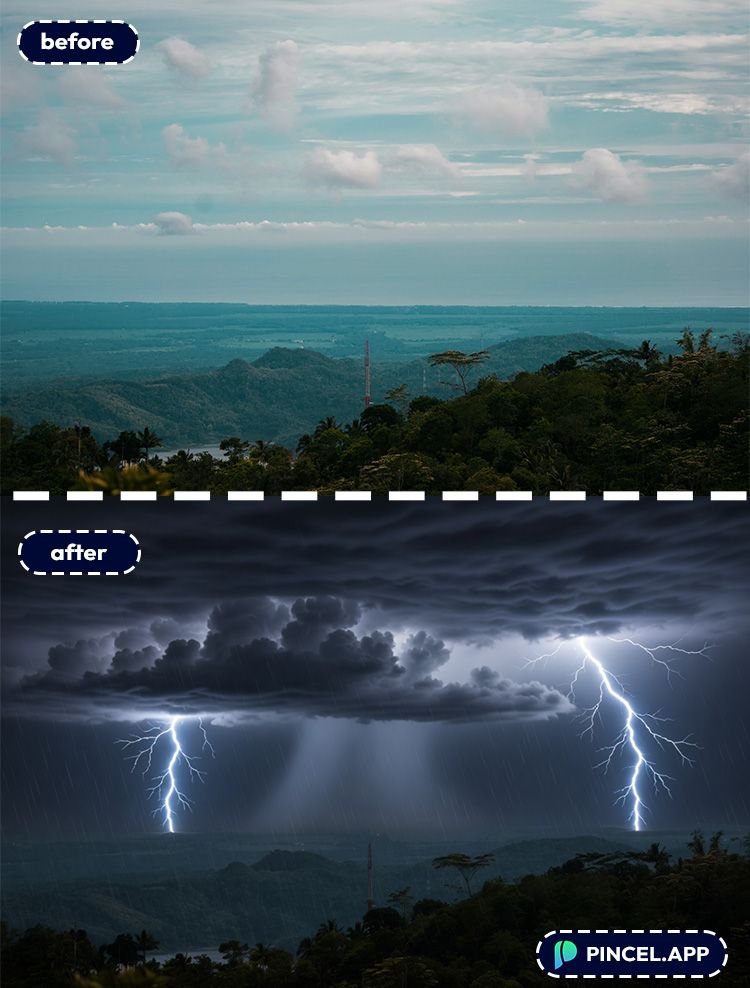
- Turn this into a cinematic night scene, darker exposure, city lights slightly glowing
Keep it “photo-realistic” if you want it believable. And if you want extra drama, say “long exposure stars” or “high contrast night sky.”
⚡ Step 3: Click Generate
Hit Generate and wait 5–10 seconds.
You’ll see the new night sky appear, usually with lighting adjustments that help it look like it was always shot that way.
If it’s too dark, regenerate with “slightly brighter foreground” or “keep subject brightness the same.”
📥 Step 4: Refine, Download, and Post
If you like the result, download it and you’re done.
If you want variations, tweak one phrase and generate again.
That iteration loop is the secret sauce, and it still happens in seconds.
Who Is This For? Real-World Use Cases 👇🏼
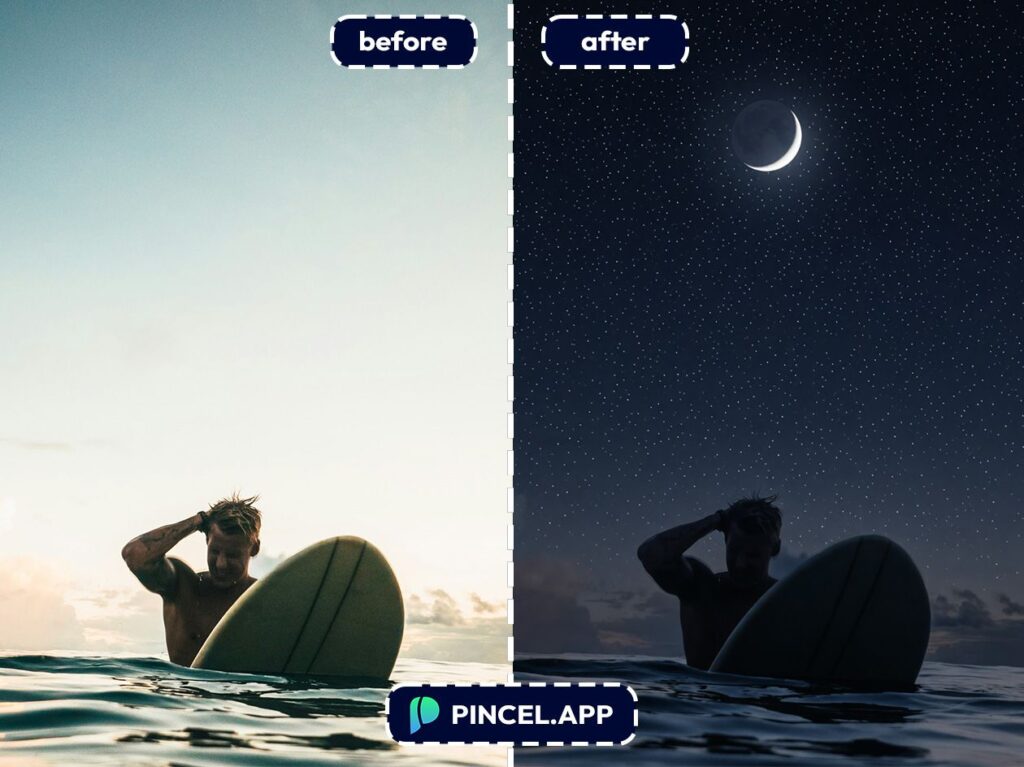
Social media creators — Turn “meh sky” shots into scroll-stoppers for Reels covers, thumbnails, and posts.
Pair it with quick edits like change weather in a photo when you want rain, fog, or snow instead of stars.
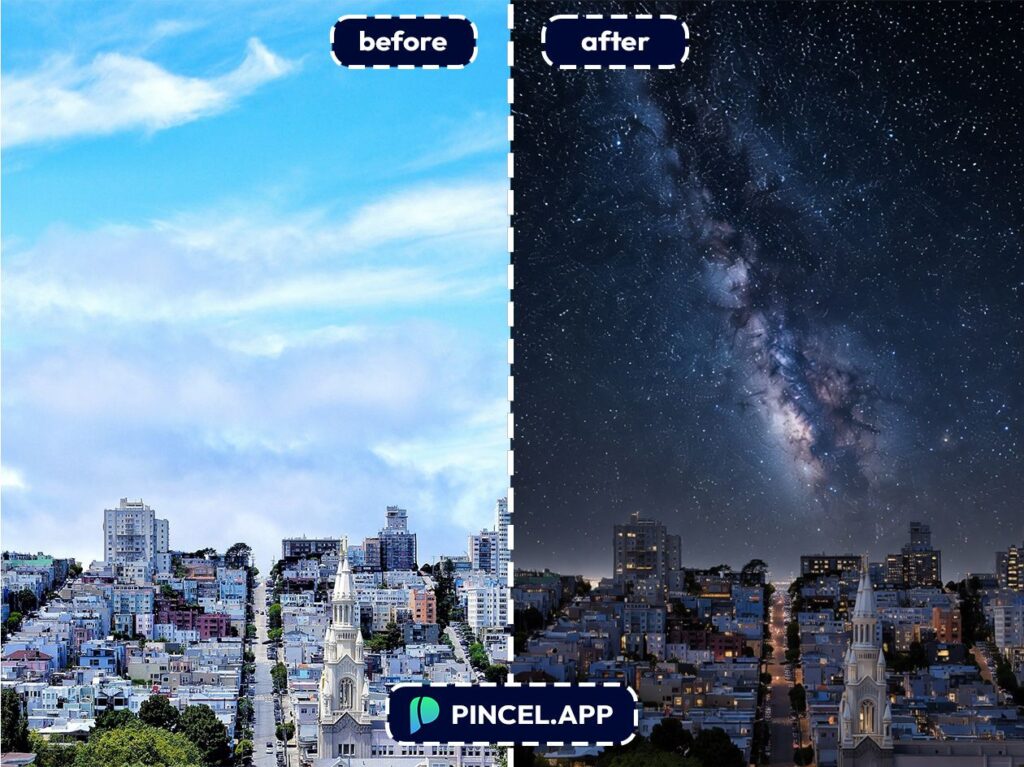
Travel photos — Make vacation landscapes look like you camped under the Milky Way (even if you were back at the hotel by 9).
If you also need more room for the sky, try extend photo with AI.
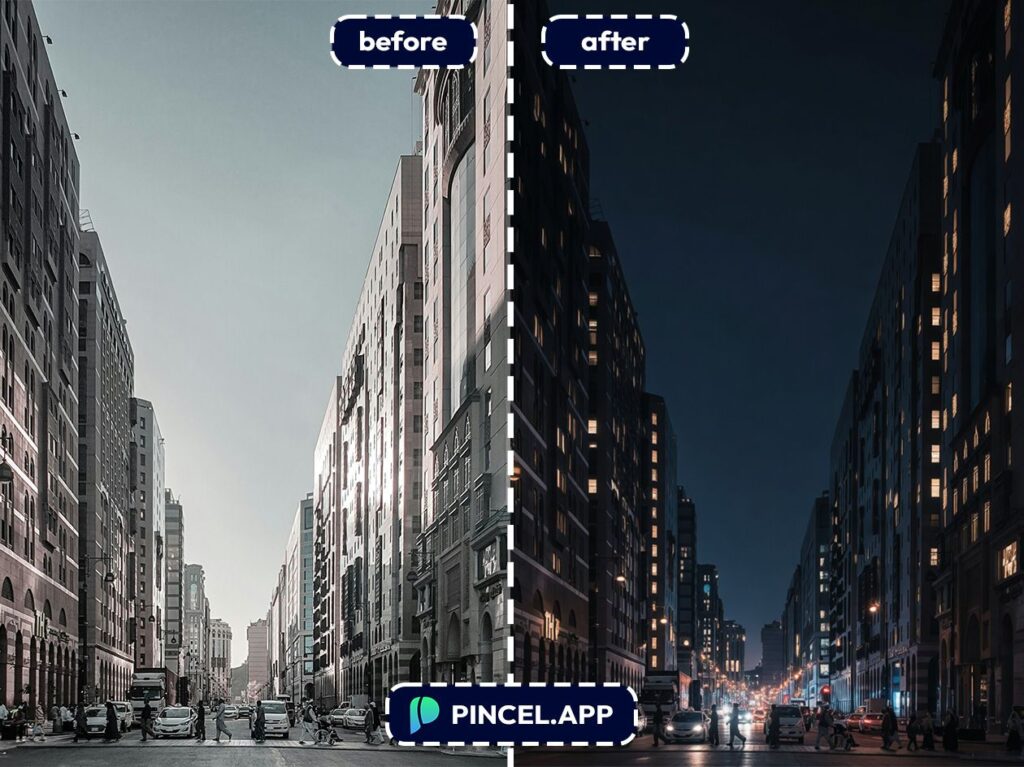
Real estate & rentals — Create an evening “twilight” vibe for listings without scheduling a sunset shoot.
And if you need a cleaner, brighter interior to match, you’ll love relight photos with AI.
Event and nightlife promos — Turn daytime venue shots into night-mode flyers in minutes.
If your design includes text, you can also edit text on an image without rebuilding the whole graphic.
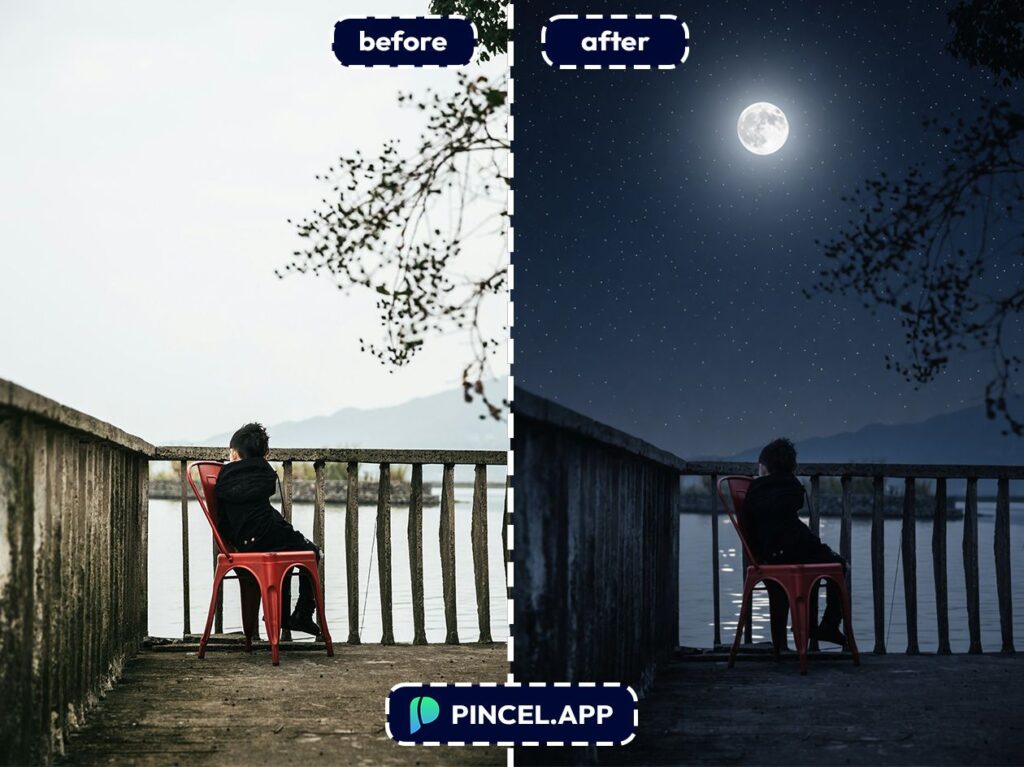
Couples and portrait shots — Add a romantic night sky behind you for anniversary posts and date-night vibes.
For themed content, check out Valentine AI photos for more “make it magical” ideas.
Automotive content — Make car photos look like a moody nighttime ad with streetlights and a deep blue sky.
If you’re also tweaking the ride, change car color pairs perfectly with a night scene.
Creative storytelling — Build cinematic scenes for album covers, book promos, or concept art without starting from scratch.
If you want more advanced composition tricks, change camera angle is a fun rabbit hole.
“Fix this one thing” edits — Sometimes you don’t want a full makeover, just a better sky. That’s where Pincel’s prompt-based control feels way lighter than a full Photoshop session.
Frequently Asked Questions 🤔
How do I add a night sky to a photo using AI?
You can add a night sky to a photo using AI by uploading your image to Pincel AI Editor and prompting it to “replace the sky with a starry night.”
The edited result typically appears in 5–10 seconds.
If you want a more natural look, add details like “realistic lighting” or “subtle moonlight.”
Will the night sky edit look realistic?
Yes, it can look very realistic when the prompt includes lighting and mood cues.
Ask for “photo-realistic,” “natural shadows,” or “match foreground exposure” to avoid the pasted-on look.
If your scene has complex edges like trees, generate a couple options and pick the cleanest blend.
Does this work on portraits or only landscapes?
It works on portraits, city shots, and landscapes.
The key is to specify what should stay the same, like “keep the subject unchanged” or “keep skin tones natural.”
If you also want a more cohesive “night” feel, combine it with relighting style prompts.
Is Pincel AI Editor free to try?
Yes, Pincel AI Editor is free to try with 20 credits and no credit card required.
Each generation uses credits, so you can test multiple night sky variations before deciding on a plan.
It’s an easy way to find your favorite look without committing upfront.
Starry-Eyed and Photo-Wise ✨
You have an amazing photo… but it during daylight.
No need to spend hours in Photoshop turning it into a night scene.
Simply upload and describe what you are thinking.
Pincel AI Photo Editor will add a night sky to your photo in a very natural way.